The Beginning
Towards the beginning, I thought this project was going to be super easy. Mr. Willauer made it seem like it was only going to take around one class period. After looking through the guided instructions, I had second thoughts. There were a lot of steps that went into the design process. The first thing I did was draw up the base in Inventor. Once I had the base dimensions made out to the correct requirements, I added the holes with the adequate radial dimensions. I extruded certain parts of the circles that were not flush with the surface based off the plans, and then proceeded to round over the edges with additional circles. After this, I uploaded it to Fusion 360. Here, I was able to select the correct contour and then create a tool path for the bit. I ran the simulation and everything went smoothly, so I proceeded to mill out the project on the CNC mill down in the lab. Once down there, I got a quick once over by Mr. Willauer to make sure everything was correct and proceeded to press play. After the mill was done taking away material, I pealed off some of the small edges left over by the machine and laser engraved my name onto the Styrofoam to prevent theft. I did not adjust the thickness that was on the laser so it took a few tries to get my name to look correct, but I got it in the end.
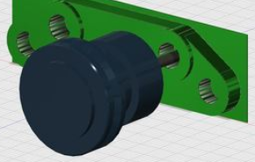
Inventor
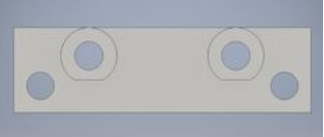
|
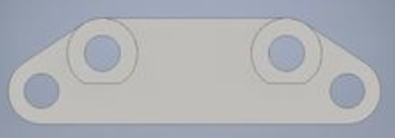
|
Fusion 360
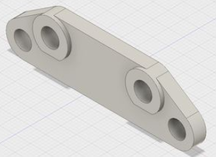
|
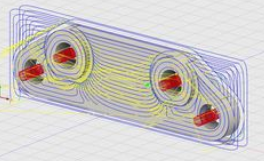
|
|
Milling Process
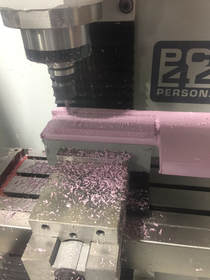
|
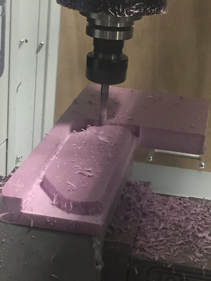
|
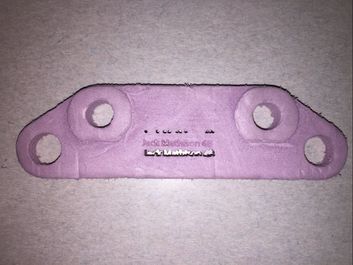
The Final Product
What I learned
I learned through first hand experience that working with software programs and operating a mill can be way harder than expected. It took me many class periods to finish drawing up the brake part. After lots of questions, I finally figured out what I was doing wrong. If I could take anything away from this project, it would be that asking questions is more than okay, it is encouraged. I can also take away from this that technology continues to blow me away with its capabilities to be incredibly accurate.
