I chose to print the phone holder...
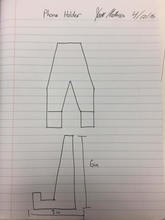
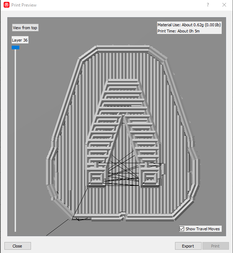
I chose to print the phone holder because I think it is the one object of the 3 available to chose from, that I would use the most. I drew up my basic design in my designer notebook, and then continued to the Inventor software to draw it up. I had a little bit out trouble drawing it up, but no matter. I was able to get it all drawn up and I changed it to an STL file. Once done, I uploaded it to the Makerbot software. I was able to see where I needed to add supports, and after doing so I took it to the preview window. From there, after everything looked in order, I took my USB drive down to the 3D printer and selected the file. From there, it was all up to the printer to do the rest of the work. Part way through the print however, the blue filament ran out, so Mr. Willauer kinda switched it to white filament.
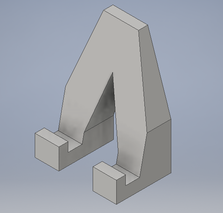
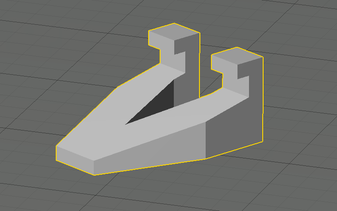
These are screenshots from the beginning, through the end...
|
|
|
|
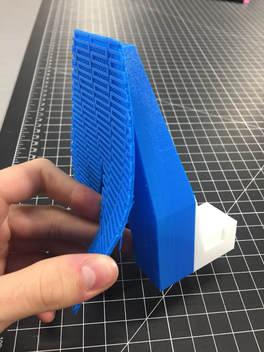
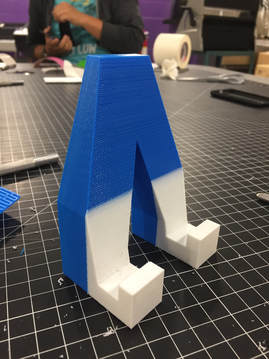
These are images of the printer in action, the supports, and the final product...

|
|
|
What I learned...
I learned that what seems to be impossible, can be made possible by 3D printing. It is amazing that someone using a computer software program can go from the computer to a machine, and have the part they created in their hand within a matter of hours. I can only imagine what will be possible in the future with the capabilities of this machine. I really hope I can use it again because it was very simple and loads of fun. I was especially amazed that the machine is smart enough to know where to apply support prints to help keep the print on track. Amazing!
